Rehber Windows 7 için Windows 10 ikonları

m3081

Hectopat
Katılım
7 Ekim 2020
Mesajlar
3.532
Makaleler
3
Çözümler
17
Daha fazla  
Cinsiyet
Erkek
Windows 7 için Windows 10 ikonları nasıl yapılır? Onu göstereceğim öncelikle bunu indiriyoruz.
İndirme linki
Sonra sıkıştırılmış klasörden çıkarıyoruz, sonra iconpack.001 dosyasını açıyorsunuz (Eğer hangi programla açacağını sorarsa ZIP programınızı seçin.)
Masaüstüne yeni klasör oluşturuyoruz ve dosyaları o klasöre atıyoruz.
O klasörü açıyoruz.
*** Bundan sonraki aşamaları uygularken hiçbir program açık olmazsa daha iyi olur. ***
Buradan.
Patchfiles dosyasını açıyoruz, bu aşamada masaüstü ve görev çubuğu gidecektir. Yani sadece arka planınız ve CMD penceresi olacak.
Bu aşama bitene kadar bir şey yapmayın.
Sonra cycfiles dosyasına sağ tıklıyoruz ve yönetici olarak çalıştıra tıklıyoruz.
Burada klavyedeki herhangi bir tuşa basıyoruz ve işlem başlıyor.
İşlem bittikten sonra y harfine basın, burada bilgisayar yeniden başlayacak.
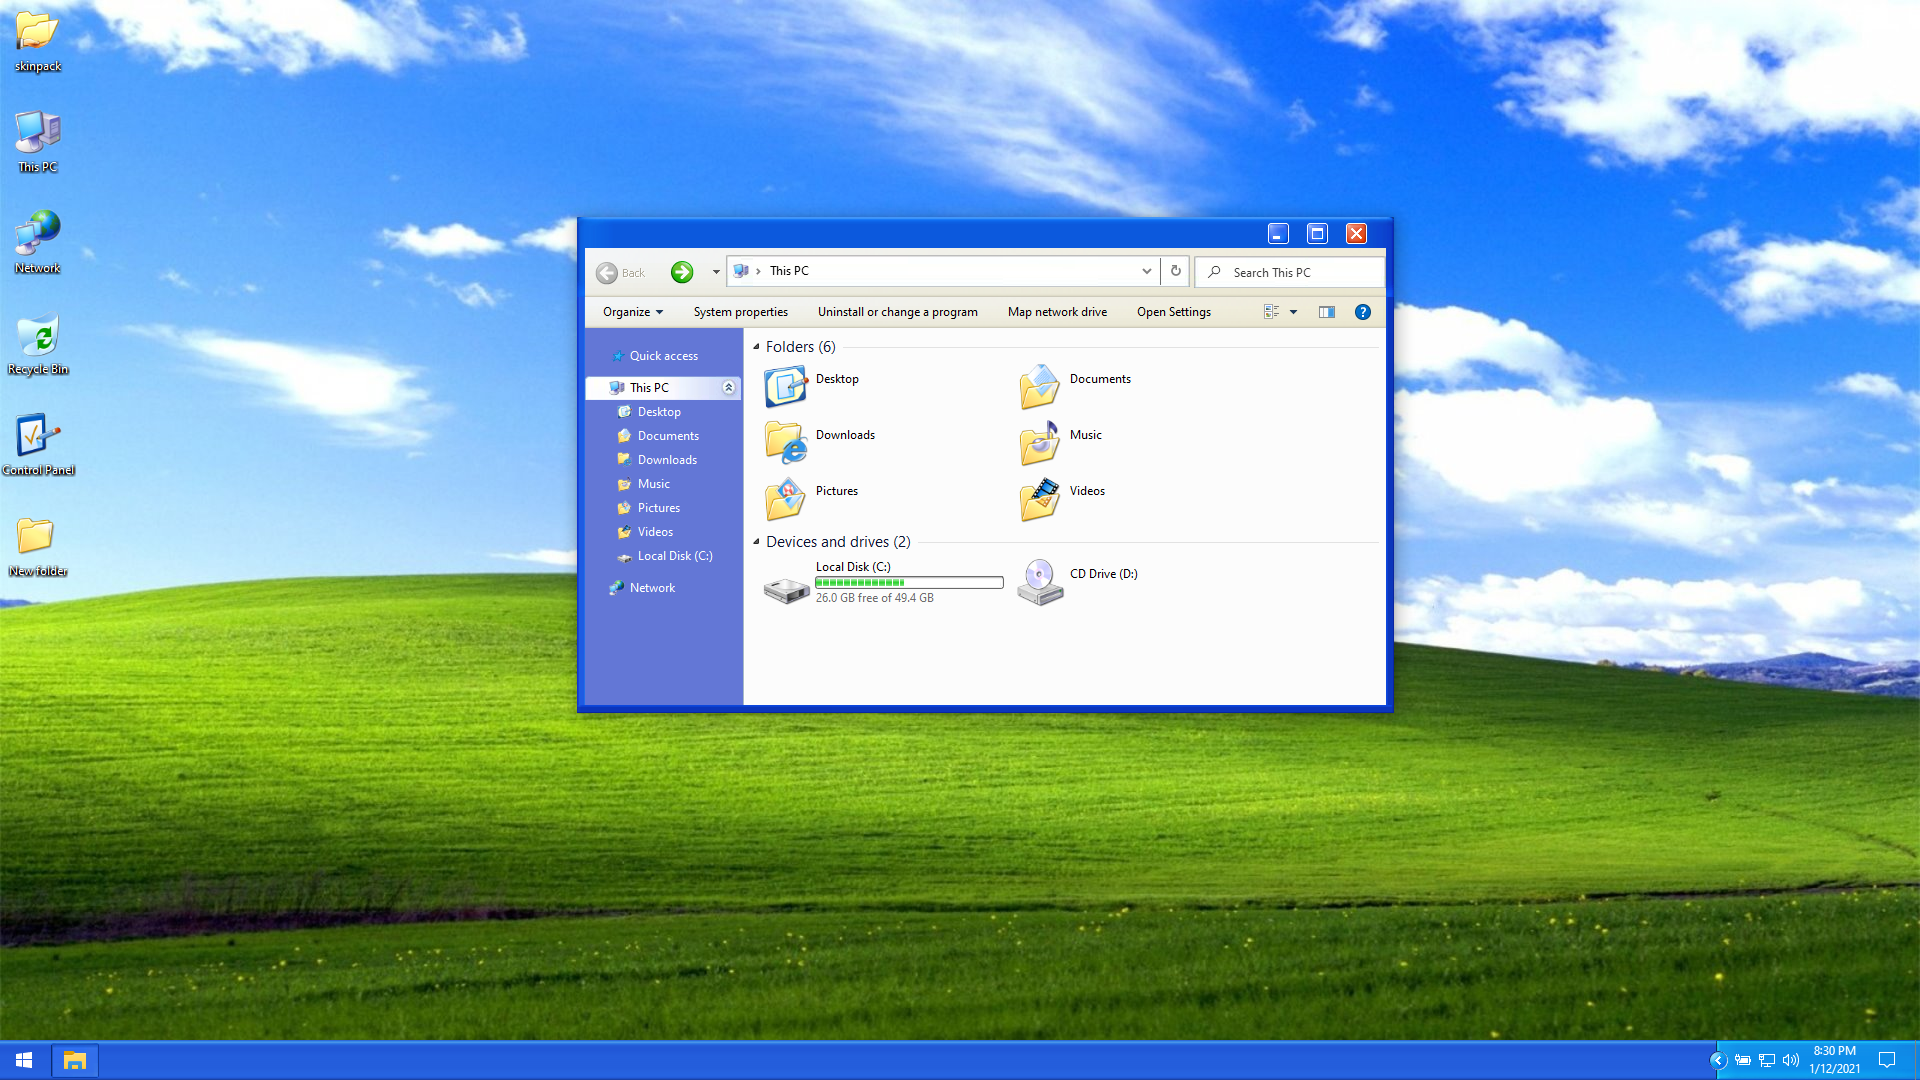
Son olarak aynı klasöre giriyoruz ve removeold dosyasına sağ tıklayarak yönetici olarak çalıştırıyoruz, işlem bittikten sonra Windows 10 ikonları olacaktır örnek.

1624893246094.png


Denetim Masası resminde ileri ve geri tuşları normalde sizde olmayacaktır, ama ben explorerframe dosyasını da çalıştırdığım için böyle oldu, tavsiye etmem.

1624893375397.png


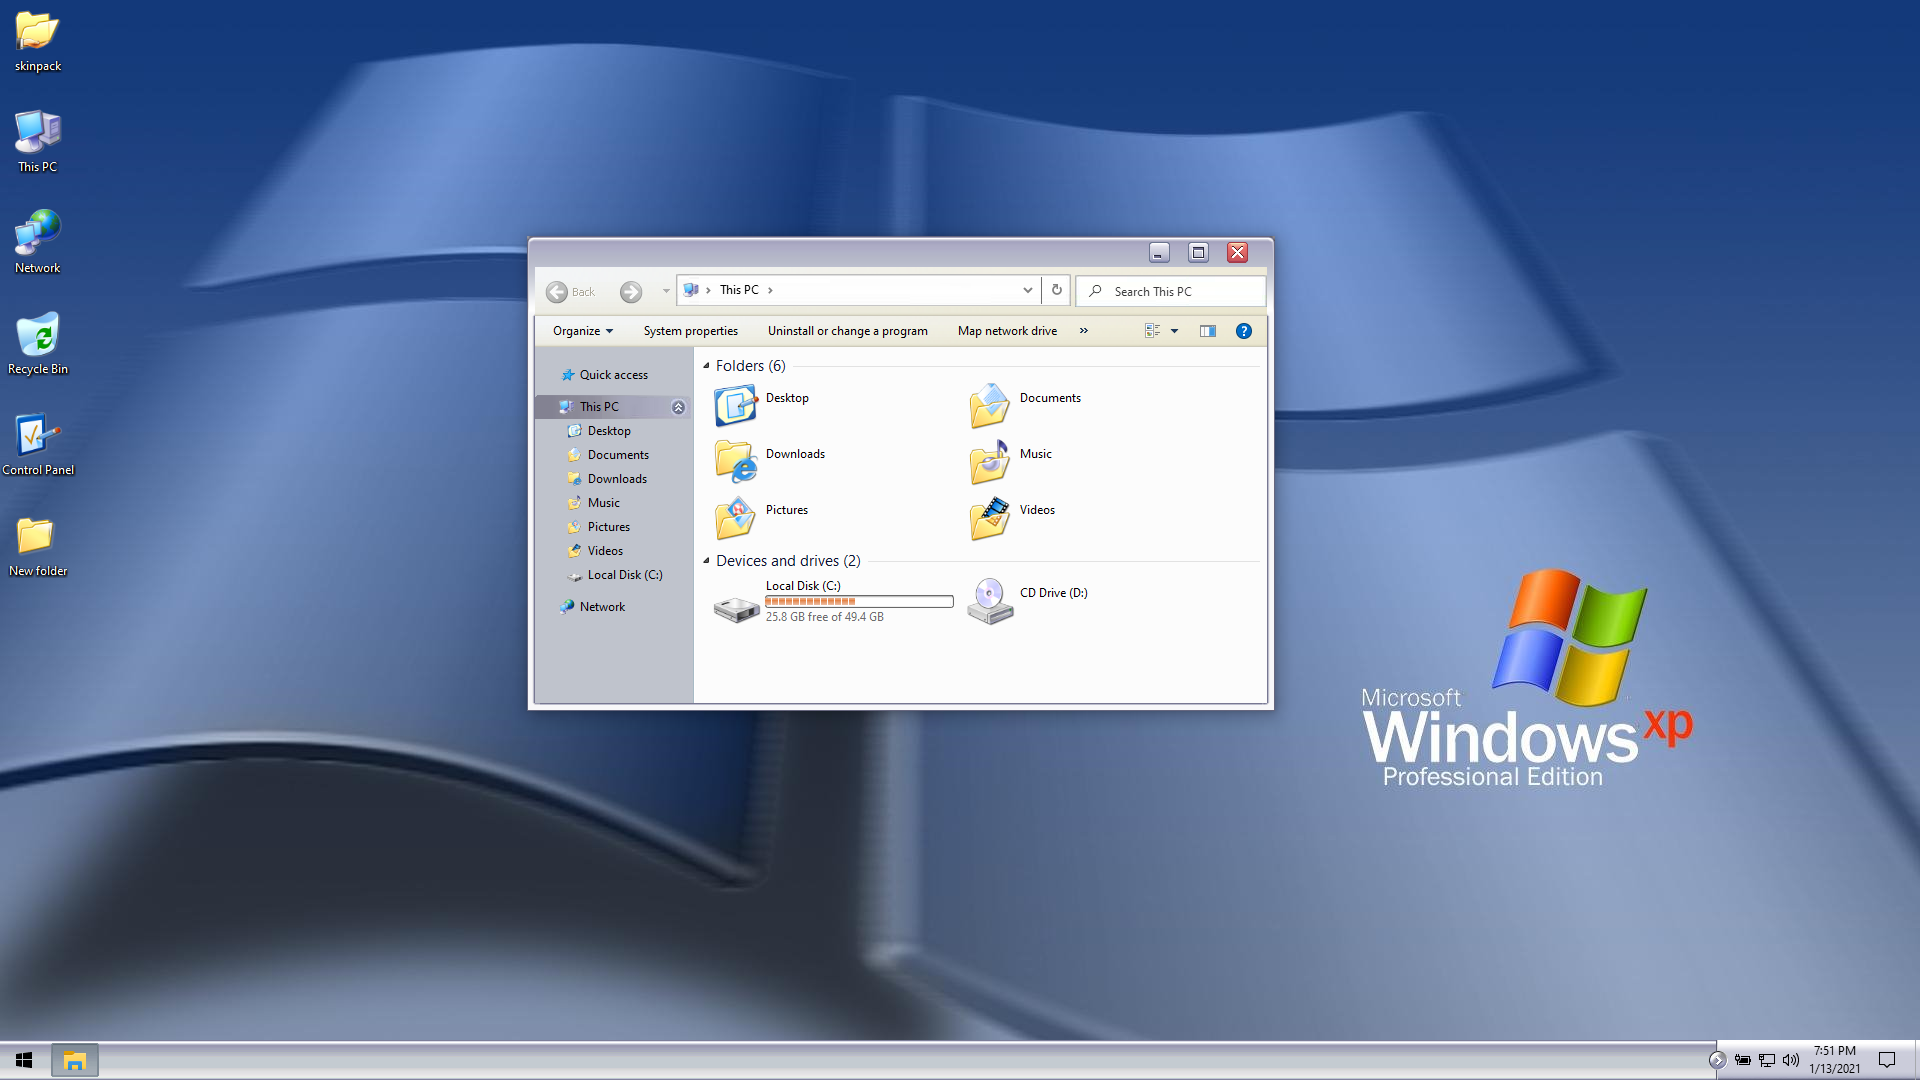
Burada da aynı sebepten öyle oldu.

1624893435226.png
 
Son düzenleyen: Moderatör:
Tema güzel, kendimi Windows 10'da gibi hissettim fakat son görseldeki geri ve ileri simgesi tema ile uyumlu durmamış.

Onları yapmanızı tavsiye etmem, onu yapmak için Explorer frame dosyasını da çalıştırmanız gerek. Ama ben çalıştırdığıma pişman oldum.
Bunlar da görev çubuğundaki görünüşleri (örnek).

1624894374905.png

Bunlar da değişen Wi-Fi ve ses simgeleri.

1624894448374.png
 
Son düzenleme:
Hocam nasıl kaldırılıyor?

Bilmiyorum bulursam söylerim ben de buradaki adımları söylüyorum.
INSTRUCTIONS /
------------*

It's recommended to close all other programs before you begin.

1- Run patchFiles. This will patch the System files with the New icons and Save them in the MODIFIED folder.
Original files will be saved in the ORIGINAL folder for Backup purposes.

2- (Optional) If you do not wish to patch certain icons you can delete the associated files under the MODIFIED folder.
Only the System files under that folder will be replaced at step 3.

For example, if you just Desire to change the taskbar icons you should delete all but the following files.
Under the MODIFIED folder:
batmeter.dll
pnidui.dll
SndVolSSO.dll
stobject.dll

*For a list of the icons associated with each file please refer to the table at the end of this instructive.

On 64 Bit Windows certain files are also present under the WoW64 folder Inside MODIFIED. You should delete.
The files from both folders.

3- Run cycleFiles AS ADMINISTRATOR. (Right-Click it, select 'Run as Administrator'). It will tell you it's going to replace.
The System files with the patched One S under the MODIFIED folder. Hit any key to continue.

4- Upon completion it will prompt you whether you wish to rebuild the CACHE and restart the System. Save whatever work you.
Need saving and type Y (Yes). If you wish to Exit without restarting you can type N (No) and run cacheRebuild later.
Rebuild is necessary to Refresh certain icons which are stored in chache.

5- That's it! After restart, the icons should have been replaced. Run removeOld as Administrator to clean .old files.
That could have been generated during the process of replacing.

6- (Optional) You can also change the default navigation buttons by running ExplorerFrame. I'D recommend changing the theme.
To One with a white background such as the One mentioned on the Preview.


UNDO - If you've made a mistake and/or you wish to GO back to the stock icons then you can:

A) Copy all the original files (Or the One S you want back as they were) from the ORIGINAL folder to the MODIFIED folder.
And run cycleFiles. This way the files will be replaced with the ORIGINALS BEFORE PATCHING.

B) Open an elevated command prompt (As in right-Click Command Prompt under All Programs/Accessories and 'Run as Administrator')
Type this command:
SFC /Scannow and hit enter.

This will iterate over ALL System files and repair those who it detects have suffered changes. It should hardly generate.
Any problems but it could, for example, remove Custom themes and uxpatch, so use it at your own discretion.

* File/Icons Reference.
////////////////////

batmeter.dll -> Taskbar's battery icon.
cmd.exe -> Command Console icon.
DDORes.dll -> Hardware Devices icons.
explorer.exe -> Windows Explorer icon.
imageres.dll -> Most of the icons used by Windows.
mmres.dll -> Audio Devices icons.
networkexplorer.dll -> Network related icons.
pnidui.dll -> Taskbar's Network icons.
shell32.dll -> Core icons used by Windows on contextual menus, dialogs, and more.
SndVolSSO.dll -> Taskbar's sound Control icon.
stobject.dll -> Taskbar's device Manager icon.

- DISCLAIMER -

I claim no ownership over the icons in the included resources except where otherwise specified.
This package contains Media which belongs to their original copyright owners and was not created, designed nor
Modified by me and I claim no property.

I claim no ownership of the Resource HackerTM software whatsoever.

Scripts contained in this package, namely "cycleFiles.bat", "patchFiles.bat", "ExplorerFrame.bat", and icon groups
3082 through 3089, 3066, 3067 and 3027 through 3032 contained under pnidui resource file are property of their rightful owner and as such
They are not to be distributed VIA any website domain or any other Media without the prior written approval of the copyright owner.
Protected under Creative Commons CC BY-NC-ND.

Project is not intended for commercial use and as is not to distributed VIA any means.
With that purpose.

A user of the software contained in this package acknowledges that he or she is receiving this software
On an "as is" basis and the user is not relying on the accuracy or functionality of the software for any purpose.
The user further acknowledges that any use of this software will be at the user's own risk and the copyright owner accepts
No responsibility whatsoever arising from the use or application of the software.
A) Tüm orijinal dosyaları (Veya eski haline getirmek istediğiniz One S'yi) ORİJİNAL klasöründen MODIFIED klasörüne kopyalayın.
Ve cycleFiles'ı çalıştırın. Bu şekilde dosyalar, YAMA YAPMADAN ÖNCE ORİJİNALLER ile değiştirilecektir.

B) Yükseltilmiş bir komut istemi açın (Tüm Programlar / Donatılar ve 'Yönetici Olarak Çalıştır' altındaki Komut İstemi'ne sağ tıklayın)
Bu komutu yazın:
SFC / Scannow ve enter tuşuna basın.

Bu, TÜM Sistem dosyaları üzerinde yinelenir ve değişikliklerden muzdarip olduğunu tespit edenleri onarır. Zor üretmelidir.
Herhangi bir sorun, ancak örneğin Özel temaları ve uxpatch'i kaldırabilir, bu nedenle kendi takdirinize bağlı olarak kullanın.

* Dosya / Simge Referansı.
Bunu da bulursam yeni rehber açarım.

1624894904354.png
 
Anlattığın bilgiler için teşekkür ediyoruz. Bir de senden Windows XP görünümüne sahip bir tema bekliyoruz.

Şimdilik bunu kullanabilirsiniz, eğer gerçek bir XP teması bulursam paylaşırım.
Bu yöntem görev çubuğunu çok güzel bir şekilde XP teması yapıyor.

1624895423430.png

Bu da farklı bir temanın indirme linki.
Sadece bu sürümleri diyor ama kllandığınız sürümde deneyebilirsiniz.

1624895605642.png

Bu da farklı bir temanın indirme linki.
Sadece bu sürümleri diyor ama kllandığınız sürümde deneyebilirsiniz.

1624895605642.png

Onu yapmak için önce oradaki son sürümün klasörünü açın ve içindeki dosyaları buraya kopyalayın.

1624895912098.png

Sonra ayarlardan temayı seçin.
Bu içeriği görüntülemek için üçüncü taraf çerezlerini yerleştirmek için izninize ihtiyacımız olacak.
Daha detaylı bilgi için, çerezler sayfamıza bakınız.
Düzeltme: Link hatalıymış.
 
Son düzenleme:
Peki bunun tam tersi şeklini yapabilir miyiz yani şey Windows 10 için Windows 7 ikonları falan.
 

Geri
Yukarı